Well this a close one, no one will probably really be able to use this costume tutorial until next year, but I am proud of myself for getting this posted before Halloween!
Small victory here.
I mentioned this last year, but I will reiterate again for those who might be new.
At the school my son attends the children may dress up for Halloween if they complete a book report for the month.
If they do dress up it can't be anything undead, scary, evil, etc.
Last year my son wanted to be Dracula for Halloween, but that costume wouldn't cut it for school, so he was Dracula for trick-or-treating, and we made him a spider costume for school. (You can check out the spider costume tutorial here).
This year, again, he wants to be Dracula for trick-or-treating, but knowing the policy of his school he chose to be a dragon there.
Like the spider costume from last year, I didn't want to spend a lot of money, so I went a DIY route with it.
 Now you may be asking yourself, Why did she go to all this work for one costume to be worn only a couple of hours at school? (Don't worry, my husband asked me the same question...)
My response is, It will be worn/used more than once!
I made the costume specifically so it can be added to our 'collection' of 'dress-up items.
We still have all of our super hero masks and both of my boys use them, so I thought this would be nice to have something new to add to that.
Let's check out how this all came together, shall we?
My son told me he wanted to be a red dragon with yellow spikes.
I found a red long sleeve shirt and pants at Wal-mart for about $3/each. They also had this dark yellow felt, so I picked up 9 pieces at .29/each.
Let's start out with the top half of the costume, the shirt and wings.
I started out by cutting out diamond shapes. These ones would be going down his back so I made them all the same size.
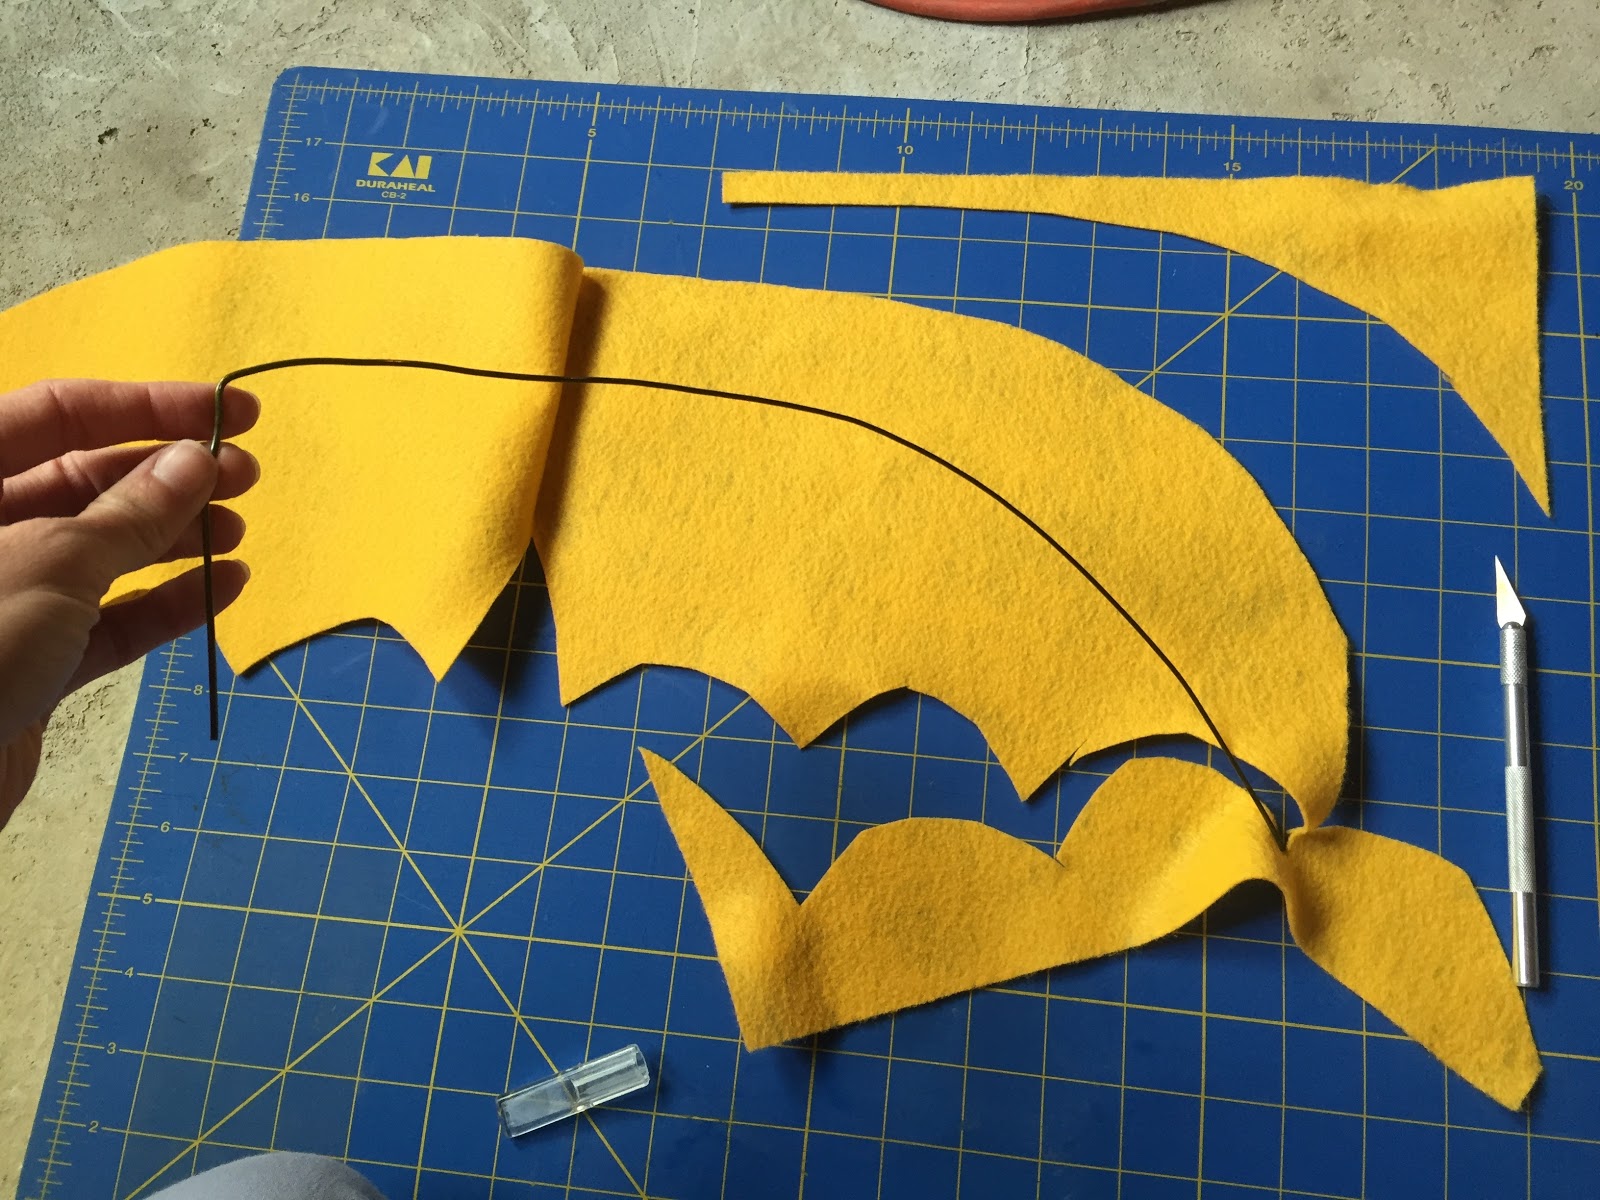
 I then drew and cut out the wings. I cut out 4 wing pieces total.
 I had researched a couple of different methods for making the spikes, and ended up using a few different elements.
I folded 4 diamond shapes in half, to see where the middle was, and lined them up down the middle of the back of the shirt.
I then ran a straight stitch using my sewing machine right down the middle of all of the diamonds.
 Using a hot glue gun, I brought the two sides of the diamond up, creating the triangle shapes for the spikes.
 Here they are laying flat for you to get an idea of what was going on.

 Onto to the wings now, I mentioned before that I cut out 4 wing pieces.
Take 2 pieces and place them on top of one another.
 I had an old wire coat hanger so I cut it to the length of the wing and bent it to be the same shape.
 Using my hot glue gun I then glued around the inside of the wings with the wire coat hanger in there as well.
 Here are both wings all ready to have their details added!
 I had some black puffy paint on hand, so I traced around the outside of the wings and added some lines for more detail.
I've used this paint for numerous other projects, I'm amazed there's still a lot of paint in that little bottle!
 I then set them aside and let them dry completely.
 While the wings were drying I grabbed the long sleeve shirt and some more felt.
I was originally going to only do a big oval shape on the stomach part, but I felt like it looked incomplete.
I ended up using to pieces of felt to cover from the neck to the bottom of the shirt.
You can kind of see the line across where the two pieces meet.
I used my hot glue gun to attach the felt to the shirt.
 I then used the black puffy paint again and traced all around the felt and added lines across to make it look like the underbelly of a dragon. I also made sure that I drew a paint line over where the two pieces of felt meet, so you can't even tell it's not just one big piece.


 And that's it for the top part!
Now we will move on to the tail.
Again, this is a separate piece and can be worn without the rest of the costume.
I had this random scrap piece of red fabric left over from some Avengers capes that happened to be the perfect color, score!
It was 21" long.
 I cut it at an angle so the tail would be bigger at the top and smaller at the bottom.
 I folded it in half and sewed a straight stitch down the side.
 I then turned it right side out.
It wasn't as big of a size change from the top to the bottom as I had wanted, but I didn't want to do it again, so I told myself it looked perfect :)
 I then cut out 8 diamond shapes for the spikes, making each one smaller as they went down the tail.


 For the bottom of the tail I cut out an arrow-type shape.
I honestly didn't know where I was going with this, I just kind of made a shape.
I cut out 2 pieces.
 I then sewed all around the outside of the arrow and turned it right-side out.
Don't sew across the top or you won't be able to turn it right-side out...I know from experience....
I then stuffed the arrow part with some batting.
 I pinned the arrow part to the bottom of the tail and sewed a straight line across.

 I then took more batting and stuffed the rest of the tail.


I measured around my son's waist and pinned some elastic to the opening of the top of the tail, and then folded the fabric over to close it all up.
 Sew a straight line across, and you've got a pretty sweet dragon tail!
 Here is my son modeling the finished product for us!
 I'm excited with the end result, I feel like this is something he can wear to school, run around in, and have for future play as well my other boys :).
This year, again, he wants to be Dracula for trick-or-treating, but knowing the policy of his school he chose to be a dragon there.
Like the spider costume from last year, I didn't want to spend a lot of money, so I went a DIY route with it.

My response is, It will be worn/used more than once!
I made the costume specifically so it can be added to our 'collection' of 'dress-up items.
We still have all of our super hero masks and both of my boys use them, so I thought this would be nice to have something new to add to that.
Let's check out how this all came together, shall we?
My son told me he wanted to be a red dragon with yellow spikes.
I found a red long sleeve shirt and pants at Wal-mart for about $3/each. They also had this dark yellow felt, so I picked up 9 pieces at .29/each.
Let's start out with the top half of the costume, the shirt and wings.
I started out by cutting out diamond shapes. These ones would be going down his back so I made them all the same size.


I folded 4 diamond shapes in half, to see where the middle was, and lined them up down the middle of the back of the shirt.
I then ran a straight stitch using my sewing machine right down the middle of all of the diamonds.


The spikes were nice and stiff, but they kind of flopped back and forth a lot, so I turned the shirt inside out and giving myself a 1/2" seam allowance I sewed another straight line down the shirt.
This was to help the spikes have a more sturdy base and stick straight out more.

Take 2 pieces and place them on top of one another.


I've used this paint for numerous other projects, I'm amazed there's still a lot of paint in that little bottle!


I was originally going to only do a big oval shape on the stomach part, but I felt like it looked incomplete.
I ended up using to pieces of felt to cover from the neck to the bottom of the shirt.
You can kind of see the line across where the two pieces meet.
I used my hot glue gun to attach the felt to the shirt.


Once the shirt and wings were dry I cut out some velcro and glued it to the back of the wings,

and to the back of the shirt, right along side the spikes.
This was the wings are detachable, making them easier to put away, or just not have on if someone doesn't want them on.

Now we will move on to the tail.
Again, this is a separate piece and can be worn without the rest of the costume.
I had this random scrap piece of red fabric left over from some Avengers capes that happened to be the perfect color, score!
It was 21" long.


It wasn't as big of a size change from the top to the bottom as I had wanted, but I didn't want to do it again, so I told myself it looked perfect :)


I folded the diamonds in half to make a small crease, then placed them down the middle of the tail.
I didn't sew these, I used my hot glue gun and glued them just down the center of each diamond.

I then grabbed the sides of each diamond and brought them up, gluing them together on the inside to make them stand up straight.

I honestly didn't know where I was going with this, I just kind of made a shape.
I cut out 2 pieces.

Don't sew across the top or you won't be able to turn it right-side out...I know from experience....
I then stuffed the arrow part with some batting.


I was going to use clear thread but I forgot...


I measured around my son's waist and pinned some elastic to the opening of the top of the tail, and then folded the fabric over to close it all up.


Oh my gosh this is sooo adorable. You did a fantastic job and I know it will definitely get used again. My girls were always dressing up and making movies and having fun with all kinds of costumes and old clothes. Thanks for sharing it on Tips & Trick Linky!
ReplyDeleteThank you, that's what my hopes are for it! Thanks for stopping by!
DeleteOh wow!! LOVE IT!!! I'm a DIY costume fanatic and this one is a prize winner!
ReplyDelete▲▲ http://quirkybohomama.blogspot.com/
Ha ha well thank you!
DeleteMy daughter wants to be a dragon for Halloween this year. All the tutorials I've seen so far look soo complicated. I *might* just whip this one up... tonight. I'm a bit of a slacker this Halloween.
ReplyDeleteMy daughter wants to be a dragon for Halloween this year. All the tutorials I've seen so far look soo complicated. I *might* just whip this one up... tonight. I'm a bit of a slacker this Halloween.
ReplyDeleteAwesome! Let me know if you have any questions!
DeleteMy goodness. What a lucky little boy and great costume! Thank you for linking to the #HomeMattersParty We were thrilled to have such talent :) Hope to see you next week.
ReplyDeleteAw thank you so much for your sweet words!
DeleteAmazing tutorial but I don't think so that you need to work so hard for this. Because at now there are many shop which can provide you realistic dinosaur costume and the quality of those costume is really so good. Also thanks to author for your hard work.
ReplyDelete