Even though Thanksgiving is next week, my mind has been rather occupied elsewhere.
I have a certain amazing little guy in my life who just turned 5 last week.
The first two weeks of November were spent planning his awesome birthday bash.
I have discovered that I LOVE to plan birthday parties, and now that my son is older it's so fun to bounce ideas back and forth and give him something he really loves.
Last year for his 4th birthday bash we had the infamous Avengers themed party.
We made a Captain America Shield Pinata from cardboard. That pinata didn't cost me a penny to make, and it was awesome.
For this year's party my son requested a Lego Star Wars theme. As soon as he said that we both knew we had to make a Death Star pinata.
 Now this pinata did cost me $2.50 because I bought a ball.
I didn't have a ball on hand that was the right size...I realized later that a beach ball would have worked perfectly though...oh well.
On to the pictures! Let's see how this all came together.


 *Remember to leave a small opening around the air hole of the ball!


 Once the ball is almost all the way deflated gently pull it out of the hole.
The nice thing was we pumped the ball back up, and it's just like it was before.
My son and I took a little break from pinata making and played a sweet game of soccer in the house :)
 Next, figure out where you want the 'laser' part of the Death Star and draw a small circle.
 Cut the circle out.
 Then take the circle piece you cut out and flip it around so it indents in.
 I used duct tape to keep it in place.


The next step is to paint!
We just used a cheap grey acrylic paint.
 We painted two layers.
My son really wanted to paint the part around the laser.
 I then just painted some thin lines in kind of a design around the whole thing.
 I poked some holes in the top,
 and threaded some string to make sure it was strong enough.
Then add the candy/treats!
 And that's the story of how our pinata was made :)
We have an unfinished basement here, which turned out to be the perfect place to hang the pinata.
Here is the birthday boy taking the first swings :)

For this year's party my son requested a Lego Star Wars theme. As soon as he said that we both knew we had to make a Death Star pinata.

I didn't have a ball on hand that was the right size...I realized later that a beach ball would have worked perfectly though...oh well.
On to the pictures! Let's see how this all came together.

Here is said ball that I purchased.
It's one of the bouncy ones you can find anywhere they sell toys, in those really tall bins.
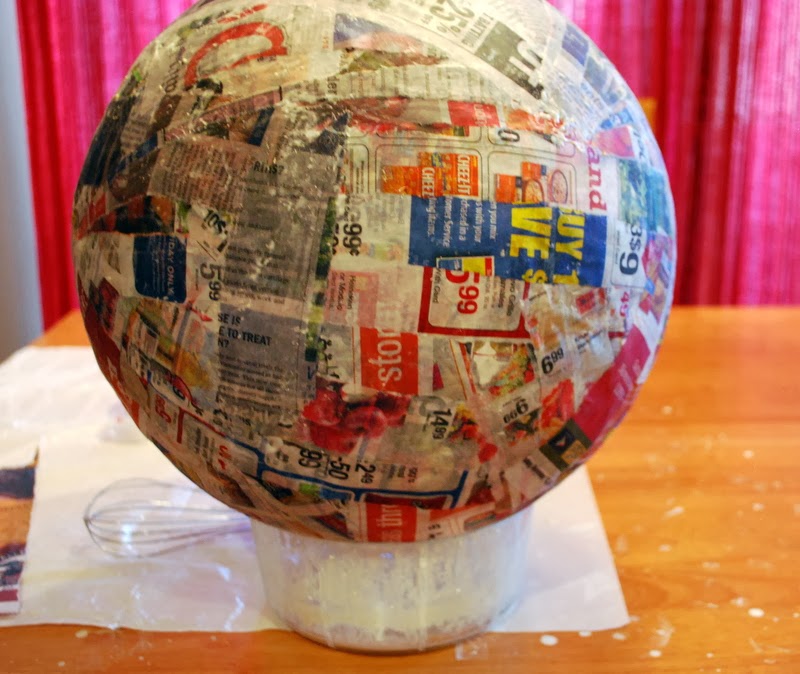
So, to start out we ripped newspaper into strips and made a paper mache paste/glue.
For the paste I just dumped some flour into a bowl, poured in some water, and mixed it together.
All you need to do is dip the newspaper strips in the paste, kind of run your fingers down the paper to get the excess liquid off, and place it on the ball.
Smooth out the paper as you go so there aren't any bumps.
Let it dry completely before doing additional layers.
We did a total of 4 layers. It took about 20 minutes to do a layer, but I let it dry a whole day before doing another one.
I wanted the pinata to be sturdy enough to give all of the kids a shot, and it was!

Once you have the desired thickness it's time to deflate the ball.
Here is my son demonstrating for us :)
It took a few minutes, but it worked!
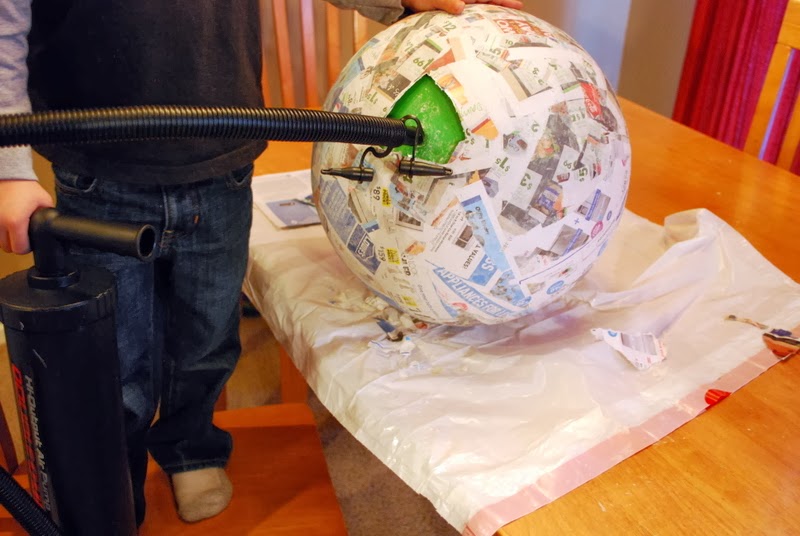

The nice thing was we pumped the ball back up, and it's just like it was before.
My son and I took a little break from pinata making and played a sweet game of soccer in the house :)


The next step is to paint!
We just used a cheap grey acrylic paint.

My son really wanted to paint the part around the laser.


Then add the candy/treats!

We have an unfinished basement here, which turned out to be the perfect place to hang the pinata.
Here is the birthday boy taking the first swings :)

So cute! I pinned it in my "little party animals" board! Found you beside my link on "Sew Many Ways." Charlie @pickledokra.blogspot.com
ReplyDeleteI love this! You totally used the crafty force! I made a death star pinata one year, but yours is way cooler. I used a balloon, so the shape was all off and the laser was just painted on. Pinning this for next time!
ReplyDeletePinatas are fun no matter what, making one yourself must make it that much cooler!! Thank you for linking to Super Sunday Sync.
ReplyDeleteWhat a fun idea! I never would have thought to make my own piñata! We'll be featuring this over at Someday Crafts tomorrow. Stop by if you have a minute :)
ReplyDeleteThis is SOOO cool, my boys are star wars nuts and would love this.
ReplyDeleteHeeheehee... this is such a great idea!!!
ReplyDeleteThis was so cute! I loved it!
ReplyDeletevery nice idea
ReplyDeletetoo cool! Pinned :)
ReplyDeleteAwesome idea!! This is so fun. :) Thanks for sharing.
ReplyDeleteCute idea. Thank you so much for sharing with Wednesday's Adorned From Above Link Party. Have a great week.
ReplyDeleteDebi and Charly @ Adorned From Above
http://www.adornedfromabove.com
I may have to make one of these for my husband's birthday since he loves Star Wars so much! You did a great job on this!!
ReplyDeleteI'd love to invite you to our weekly linkup party! http://www.sowderingabout.com/2013/12/awesome-things-tuesday.html